How do I prepare a photo trip ?
Many people ask me how do I know where are all the places to shoot, how do I prepare every trip, so I’ll share my routine here.
1) Collect, collect, collect !
First thing first : collect !
I follow quite a lot of photographers, especially in Thailand, because I live in Bangkok and with covid I don’t have much choice to travel internationally these days, so I focus on traveling locally.
You can follow these great talented photographers : @sebastien.nagy, @thismattexists, @withluke, @tiffpenguin, @trystane, @patkay, @seven7panda, @koalamarty, @f.khnnt, @florisgone, @gavsgoneagain, @phantomminn, @sunny_rung, @janderycke, @asiaanbeyond, @patoss, @demas, @donamtykl, @hasinghaa
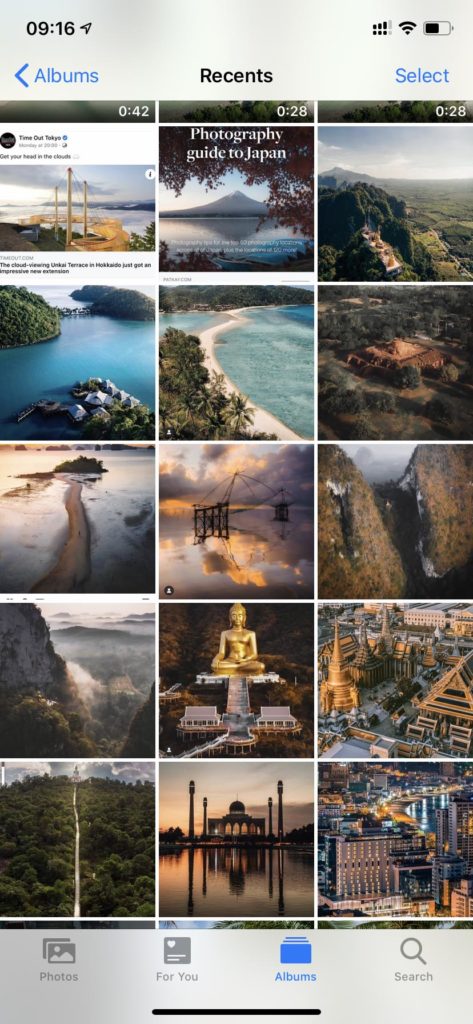
So every time I see a beautiful photography or a beautiful place on instagram, I screenshot it.
Every few weeks I check my phone and I organize all these screenshots by country / province / city.
Before going to a place, I also check what’s around on google : for example “name of the city” + “things to do”. And same here, I save all images I find interesting to visit or to photography and I organize them in folders.
2) 1st document : photo selection by location
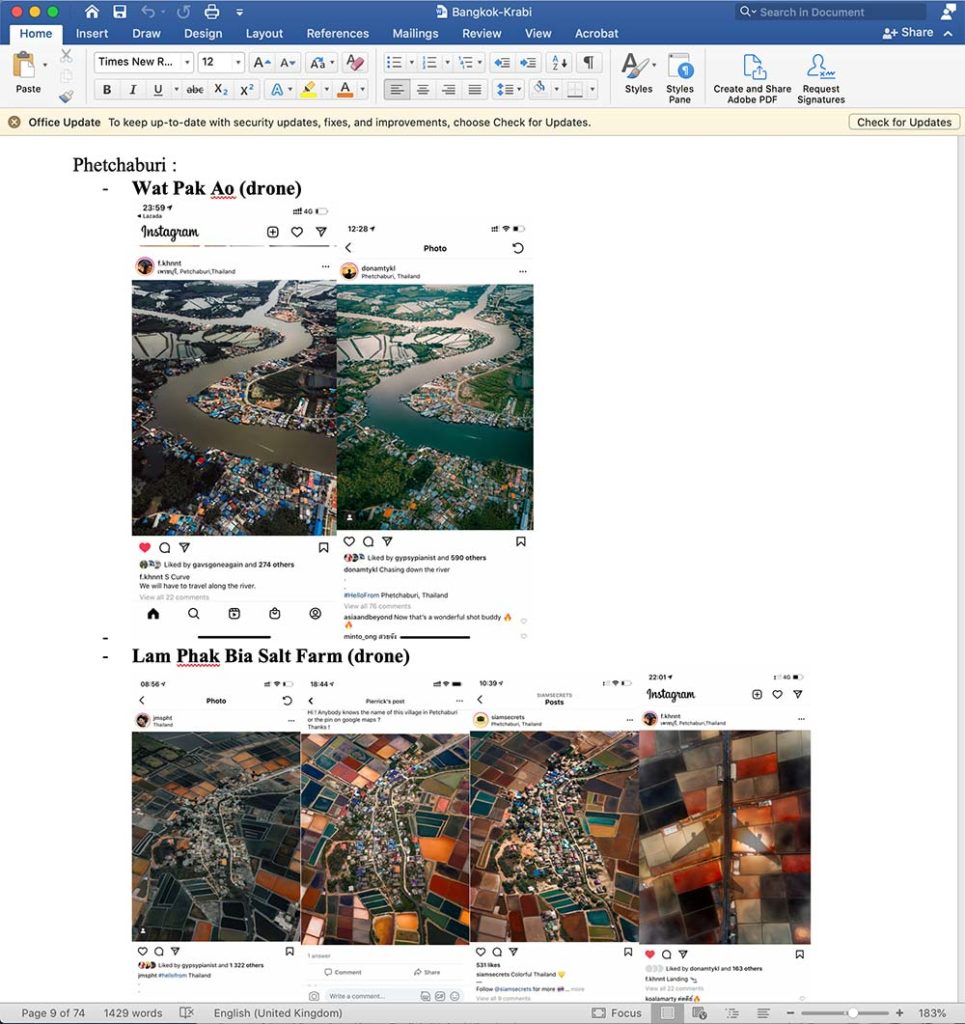
With all the images collected, I create a 1st word document with all the best photos that I want to take. Most of the time I end up taking different pictures of the same location, but it’s a reference, and it usually gives me a good starting point for the angle or viewpoint.
Then I organize it by location like the example on the left : Thailand / Province (here Phetchaburi) and the photos of the same location.
3) Itinerary :
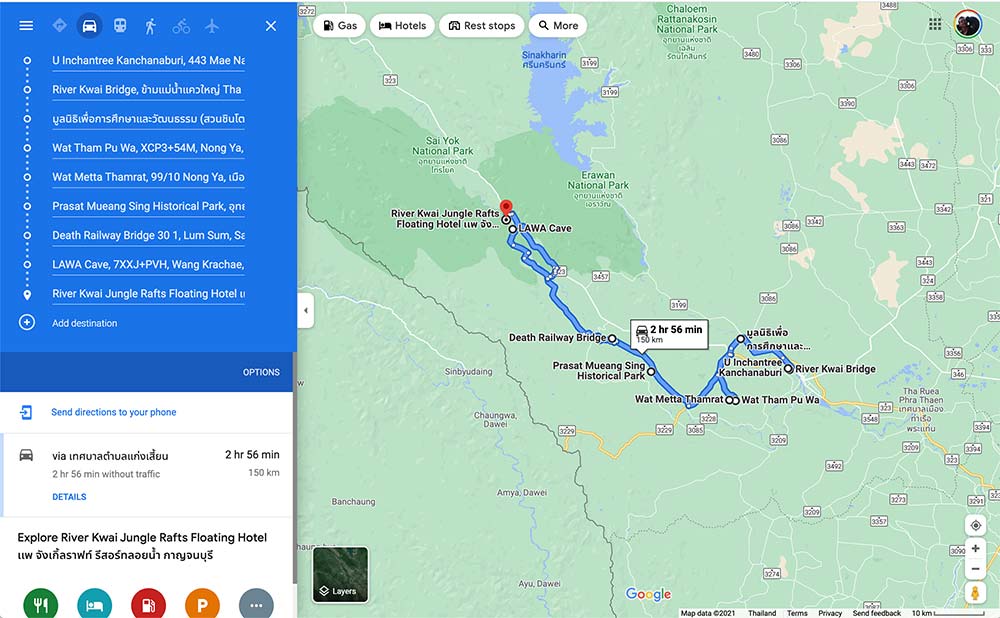
From that document, I then search all precise locations on googlemaps.
This usually can take quite a lot of time, especially here in Thailand, because the alphabet is different, and most of photographers don’t indicate the precise location where they took the pic. If you ask, some will tell you, but most of the time they won’t. So it needs a lot of search on google, travel blogs, tripadvisor etc… to find the exact name of the location (for example the name of the temple or the village), and then to find the exact location on googlemaps.
For example if I see a nice photo of a rice terrace in Chiang Mai, that would be very difficult to find the exact location, because Chiang Mai is a very big province, and there are many different places to see different rice terraces. But it’s not impossible ! So for this example, I’ll check google “most beautiful rice terraces in Chiang Mai”, I’ll check all travel blogs and collect again all images and locations. Once I find several pictures of the exact same place, I’ll check 2 things on googlemaps : satellite view and street view.
Satelitte view will show me if this is the right place, especially for drone views. And it will also show me the different places around where I could launch my drone safely. I usually search for empty space a bit away from the touristic place, so I do not bother anyone when taking off and landing.
Street view (if available) will show me if this is the exact place I’m looking for and it will give me details for other things : if the road is ok, if there are places to park, places to eat around, etc…
At the end, I put all these exact locations in googlemaps and it gives me an itinerary (using the direction button + add new stop). I’ll then change the order of the places to visit to shorten the most the itinerary. I cut then each itinerary into 6-9 stops, which is equivalent to 1 day. Normally not more than 200-300km per day or 4-5 hours of driving. That’s my limit. Here it’s up to everyone : some people will prefer to chill and relax and do just 2 or 3 stops in 1 day, some will do more. For me 6 to 8 stops in 1 day is my limit. And at the end of the itinerary, depending on where is my last stop, I’ll search for an hotel around there.
I also change the order of the stops depending on sunrise and sunset : if there are very beautiful places to visit, it’s usually best to shoot around the golden hour (1 hour after sunrise or 1 hour before sunset).
And some places require some exact hour to visit, for example a cave which have a beam of light only for 1 or 2 hours in the morning, then I’d have to arrange that as well.
4) Final document day by day
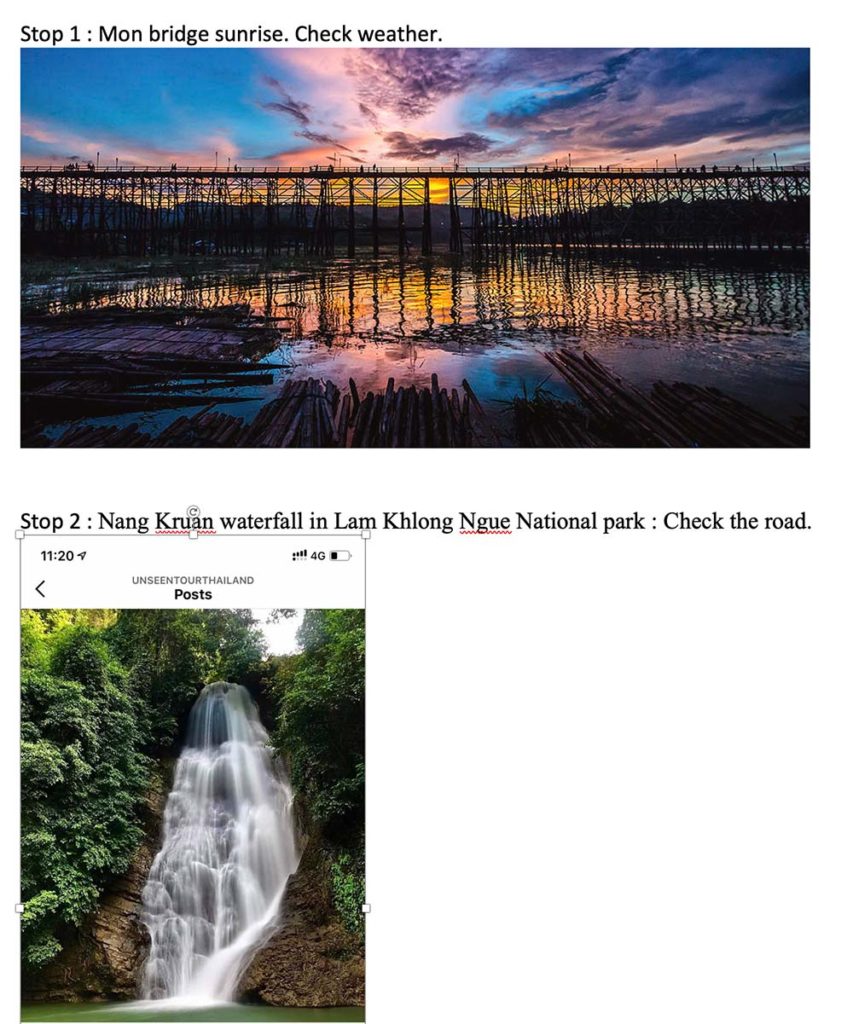
This the final document I use all the time when I travel.
I separate all itineraries day by day (Day 1, day 2, day 3, etc…) and I send it to my email.
When I drive, I use the googlemaps itinerary, and when I arrive at the destination, I open the document to see what photos I need to take. And then I take 100 more, changing angles, vantage point, zoom, altitude for drone, panoramas, etc, etc…
From these 100, I’ll keep about 40-50 to edit, and then I select about 20 to 30 to sell. Probably 20 to 25 will be approved on stock photography websites.
Each day of shooting is about 100-200 photos that I sell on stock agencies, which represents around 5-10$ of sales added to my passive revenues each month. Here I’m only talking about travel photography. Photoshooting with model is another thing, I’ll talk about it in another post.
At this time today (mid september 2021), I’ve done my best month with 1,000$ (usd) of passive revenues from stock photos and videos. And my revenues keep growing as long as I continue uploading new photos regularly.
If you want to know how to have similar passive revenues, you can check my training : www.photostockacademy.com
